Email Reports are automated email notifications that help dealerships improve their marketing, reporting, and inventory management. These reports can be configured to notify specific departments or dealership locations about key activities and data trends—without any manual effort.
Before You Begin
The CMS/Dashboard has two levels:
Dealer Level – where Email Reports are created and managed
Website Level – for website-specific content and settings
Email Reports must be created at the Dealer Level.
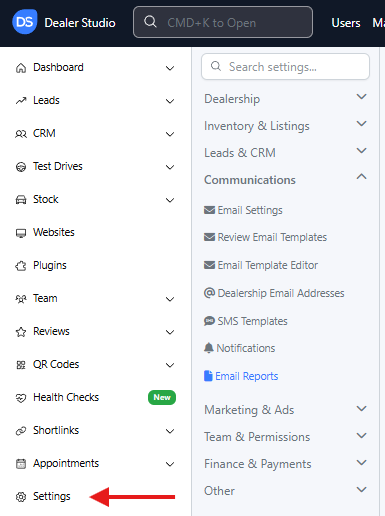
Step 1: Navigate to Email Reports
Ensure you are on the Dealer Level.
In the left sidebar, go to Settings.
Under Communications, click Email Reports.
On the top-right corner, click + Email Report to create a new report.

Step 2: Fill Out the Email Report Form
A form will appear with several fields. Below is an explanation of each field and how to use it.
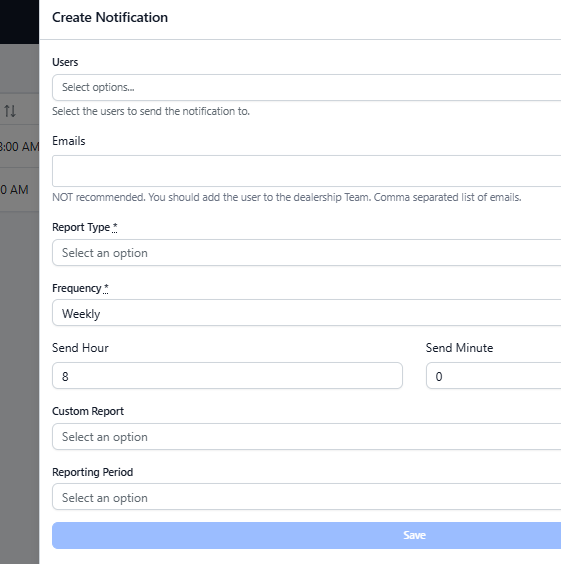
1. Users
Select the users who should receive this email report.
Suggestions may appear, but in most cases you’ll need to search by name or email.
If the user doesn't appear:
Ensure they are added as a CMS user (refer to Team Dashboard: A Quick Guide)
OR manually enter their email in the Emails field (not recommended—manual emails do not sync with user updates)
2. Emails (Not recommended)
Allows you to manually type email addresses.
Only use this if a user cannot be added through the Users field.
3. Report Type
Select the type of report/notification you want to send.
Only one report type can be selected per Email Report.
If you need multiple types, create separate entries.
4. Frequency
Choose how often the report is sent:
Daily
Weekly — sent every Monday
Monthly — sent on the first day of each month
5. Send Hour
Set the hour the report will be delivered.
Default is 8 AM AEST.
6. Send Minute
Set the minute the report will be delivered (e.g., 00, 15, 30, 45).
7. Custom Report (Ignore)
This feature is currently under development.
You may leave it untouched.
8. Reporting Period
Defines the data range included in the email report.
For example: Daily, Weekly, Monthly.
Tip: You can create multiple separate reports for different departments, teams, notification types, or locations. If a staff member belongs to multiple reports, they will receive one email per report, each containing its specific data.
Step 3: Save the Email Report
Once all required fields are filled out:
Click Save.
After saving:
The Email Report will appear in the list/table.
Additional fields will now become available. (follow Step 4)
Step 4: Configure Location and Lead Category
Click Edit on the report you just created.
Two additional fields will now be visible:
1. Location
Choose the dealership location the report should pull data from.
The data in the email will be based on this selected location.
2. Lead Category
Filter which types of leads should be included in the report.
For example:
New Vehicle Enquiry
Service Enquiry
Used Vehicle Enquiry
Test Drive Booking
Parts Enquiry
After choosing the location and lead categories, click Update Notification.
Step 5: Test Your Email Report
Below the Edit button, you will find two useful test options:
Send Now — sends the report immediately to all recipients
Send Now to Self — sends the report only to you
These options allow you to verify the email format and ensure the data is correct.
That’s It!
Your automated Email Report is now set up. Once active, it will be delivered on the schedule you configured and will help your dealership stay informed with timely marketing, reporting, and lead insights.
Happy emailing!
Was this article helpful?
That’s Great!
Thank you for your feedback
Sorry! We couldn't be helpful
Thank you for your feedback
Feedback sent
We appreciate your effort and will try to fix the article