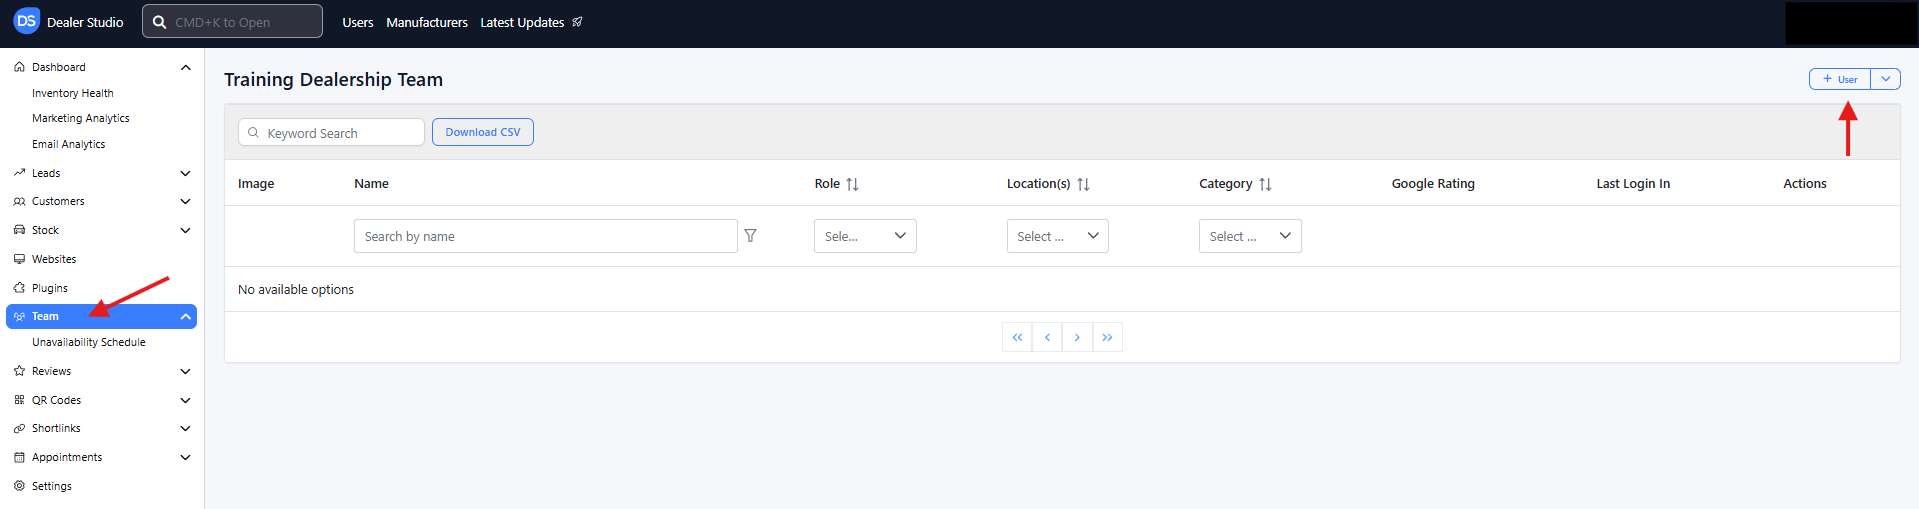
The Team Dashboard allows Admins/Managers to manage all user accounts and team settings in one place. From adding new users to controlling access levels and department assignments, this area ensures your team is properly structured and secure within the CMS.
Overview
The Team Dashboard is designed for user and permission management. It’s not focused on analytics or performance tracking; instead, it provides the tools you need to create, edit, and organize team members across different departments and locations.
You can:
Add new users and manage their login details.
Assign roles and permission levels.
Control which lead categories users can access.
Allocate users to specific departments (Team Profiles).
Manage multi-location access.
Creating a New User
Click “Add User” at the top of the Team Dashboard.
Fill out the following details:
Full Name: The user’s name as it should appear in the system.
Position / Job Title: Helps identify their role within the organization.
Email Address: Used for login and system notifications.
Phone Number: Required for multi-factor authentication (2FA) during login.
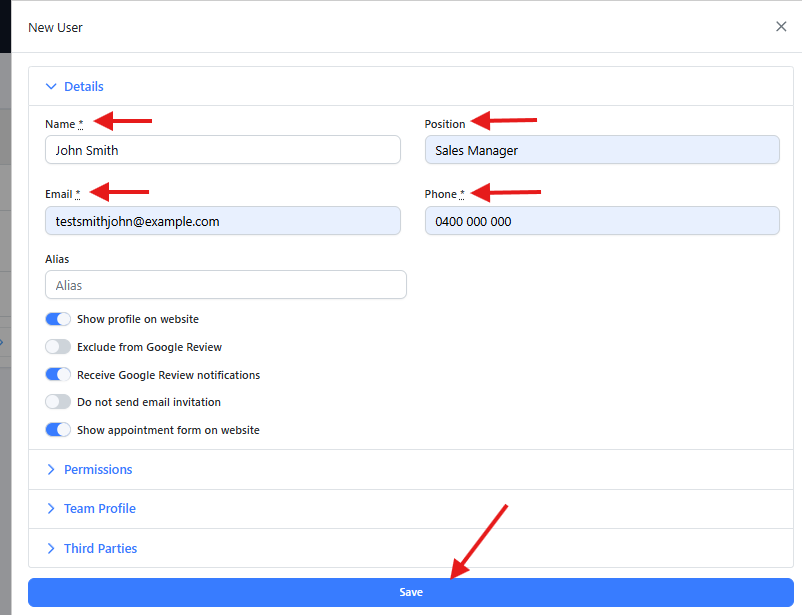
Once you’ve entered all required details, click Save to create the account. The new user will receive an email invitation to set up their password and complete their 2FA setup.
Why is the phone number required?
The phone number is used for two-factor authentication (2FA). If the user chooses email or SMS as their verification method, a one-time security code will be sent to this phone number to help protect their account.

Setting Roles and Permissions
Each user can be assigned a role that defines what they can see or do in the CMS. Roles typically determine access to content management, lead data, settings, and reporting.
You can also:
Assign users to one or multiple locations (departments) if your organization operates across different sites (dealerships).
Adjust permission levels if a user’s responsibilities change (for example, promoting a salesperson to a manager role).
Manager role has admin level access to the CMS and will be able to see more things in the dashboard.
Tip: Keep permission levels limited to what’s necessary to maintain data security and prevent accidental changes.
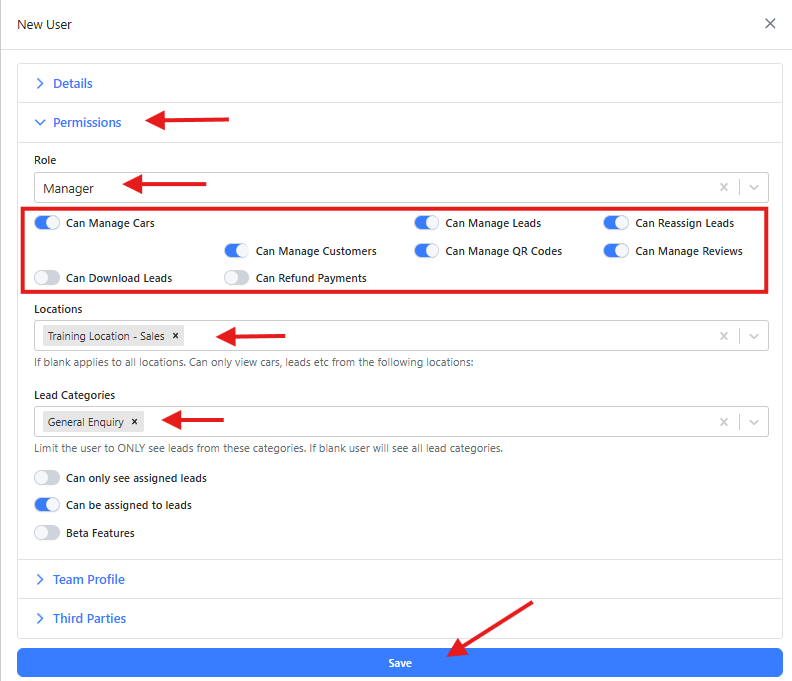
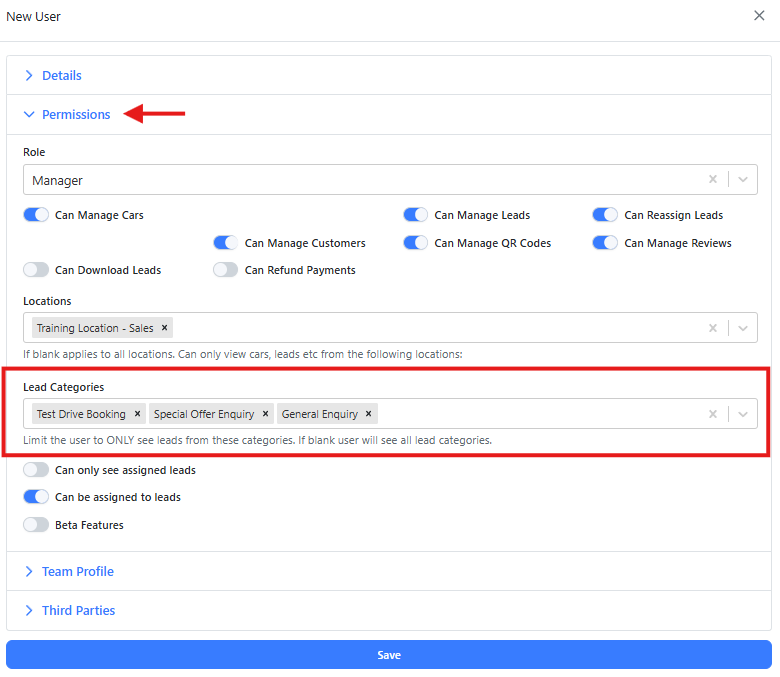
Lead Category Access
You can restrict each user’s access to specific lead categories, ensuring they only view leads relevant to their role.
Common lead categories include:
New Vehicle Enquiry
Used Vehicle Enquiry
Service Enquiry
Test Drive Booking
Parts Enquiry
General Enquiry
Select one or multiple categories as needed. This helps streamline workflows and maintain privacy between departments.
Note: Always review Location (department) allocations and lead category permissions after any organizational changes to ensure access remains accurate. For eg: John is allocated to Location A, he can only receive leads from Location A.
Team Profile
Every user can be assigned to a single Team Profile, which defines their primary department or business area. This helps with reporting, internal communication, and organizational clarity.
Typical team profiles include the following Category (department):
Management , Sales, Pre-Owned Vehicles, Fleet, Service, Parts
Within each user’s profile, you can also add a biography. This is a short description of their role, background, or responsibilities—useful for internal reference or displaying on public staff pages.
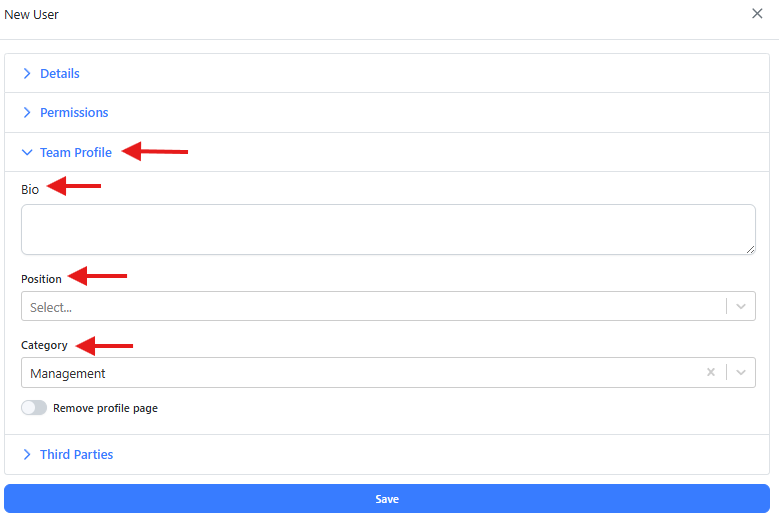
Position (Hierarchy Level)
Within the Team Profile settings, you’ll find a dropdown field called Position. This setting defines the user’s hierarchical level within the team or department.
The dropdown includes numeric values from 1 to 5, where:
1 represents the highest level in the hierarchy (e.g., General Manager, Dealer Principal).
5 represents the lowest level (e.g., Trainee or Support roles).
This hierarchy can be used to determine the display order of team members on your public team page. Each team profile is shown as a tile, and the tiles are arranged according to the position index—starting with 1 at the top or front of the list.
Tip: Assign each user a position level that accurately reflects their role to maintain consistent team structure and permissions.
Managing Existing Users
Edit User: Update details, roles, or permissions as needed.
Removing User: Remove dealership access.
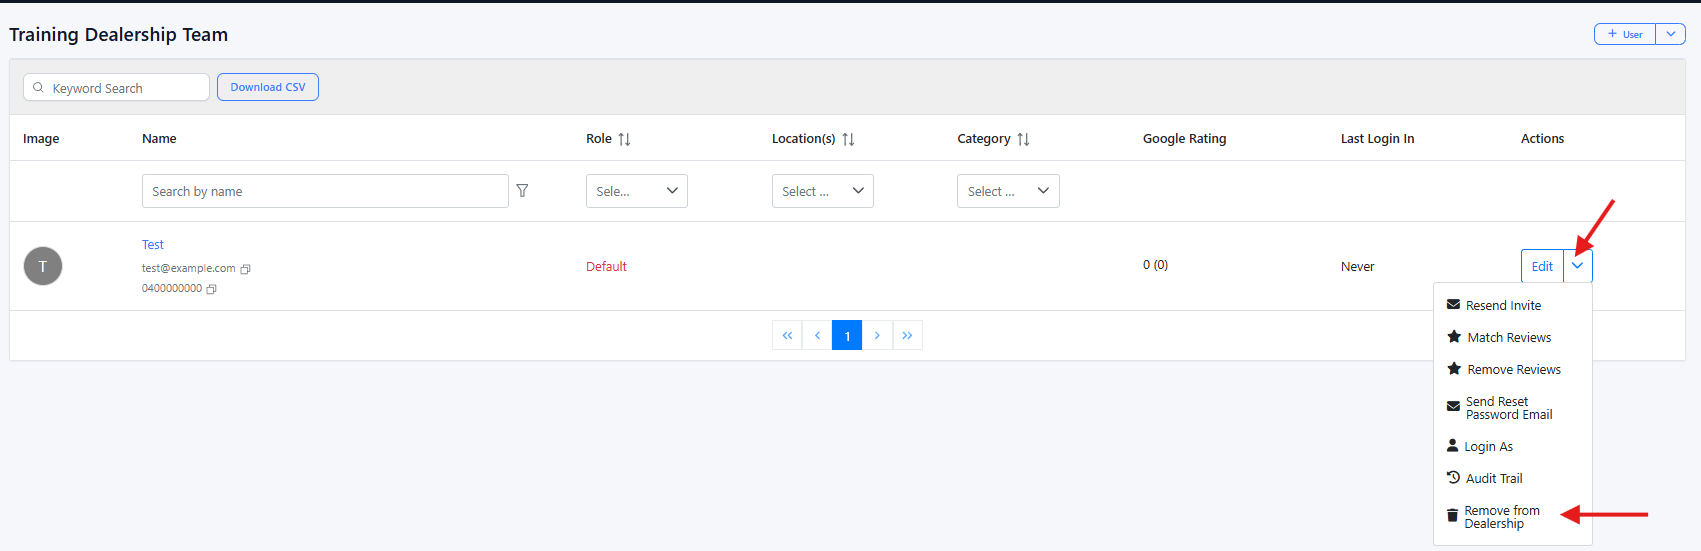
Cautious: Always review before removing a user from the dealership. Removing them will erase all existing data and can never be retrieved again.
Best Practices
Review user permissions regularly to maintain proper access control.
Encourage staff to keep their contact details up to date to prevent MFA issues.
Use descriptive job titles and accurate team profiles for better visibility and reporting.
Limit high-level permissions (like admin access) to a small number of trusted users.
What's Next: To learn how to create a Team Page on the website, visit: How to create Team Page
Was this article helpful?
That’s Great!
Thank you for your feedback
Sorry! We couldn't be helpful
Thank you for your feedback
Feedback sent
We appreciate your effort and will try to fix the article