Overview
Automated follow-up tasks allow you to schedule future tasks automatically when a lead moves into a specific status. For example, you can set a phone call to be created 30 days after a lead is marked as Delivered, or an SMS reminder 180 days later.
Each follow-up task is assigned to the lead's current assignee and queued automatically. This feature requires Lead Cluster Tasks to be enabled in LMS Settings.
Setting Up Automated Follow-Up Tasks
- Go to Settings > Leads & CRM > Lead Settings.
- Under Pipeline, find the lead status you want to add follow-up tasks to.
- Click Edit on that status.
- Scroll down to the Automated follow-up tasks section and click Add follow-up task.
- Fill in the following fields:
- Task title: A name for the task (e.g. "Post-delivery check-in" or "6 month service reminder").
- Type: Choose Phone, Email, or SMS.
- Days after status change: How many days after the lead moves into this status the task should be created.
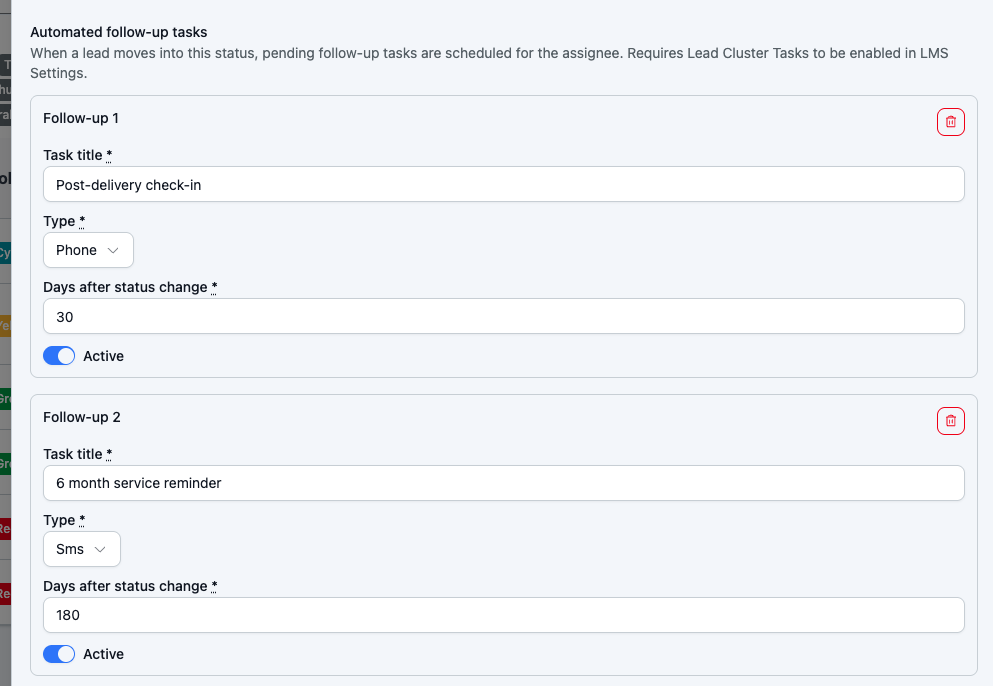
- Toggle the task Active to enable it.
- Click Save.
Adding Multiple Follow-Up Tasks
You can add more than one follow-up task per status. Click Add follow-up task again to create additional tasks with different titles, types, and timings. Each task can be individually toggled active or inactive, and deleted using the trash icon.
Example
For a "Delivered" status, you might set up:
- Follow-up 1: "Post-delivery check-in" via Phone, 30 days after status change.
- Follow-up 2: "6 month service reminder" via SMS, 180 days after status change.
Was this article helpful?
That’s Great!
Thank you for your feedback
Sorry! We couldn't be helpful
Thank you for your feedback
Feedback sent
We appreciate your effort and will try to fix the article