This article provides an overview of the Menu Editor in the Pages Editor. It explains how users can create, organize, and manage navigation menus, including adding menu items, submenus, and links. Ideal for users who want to structure their website navigation efficiently, improve user experience, and maintain a consistent site layout without coding.
Step 1: On the Dealership Dashboard, select Websites

Step 2: Select the Desired Website to edit
Step 3: Once on the Website Dashboard, select 'Menu Editor'
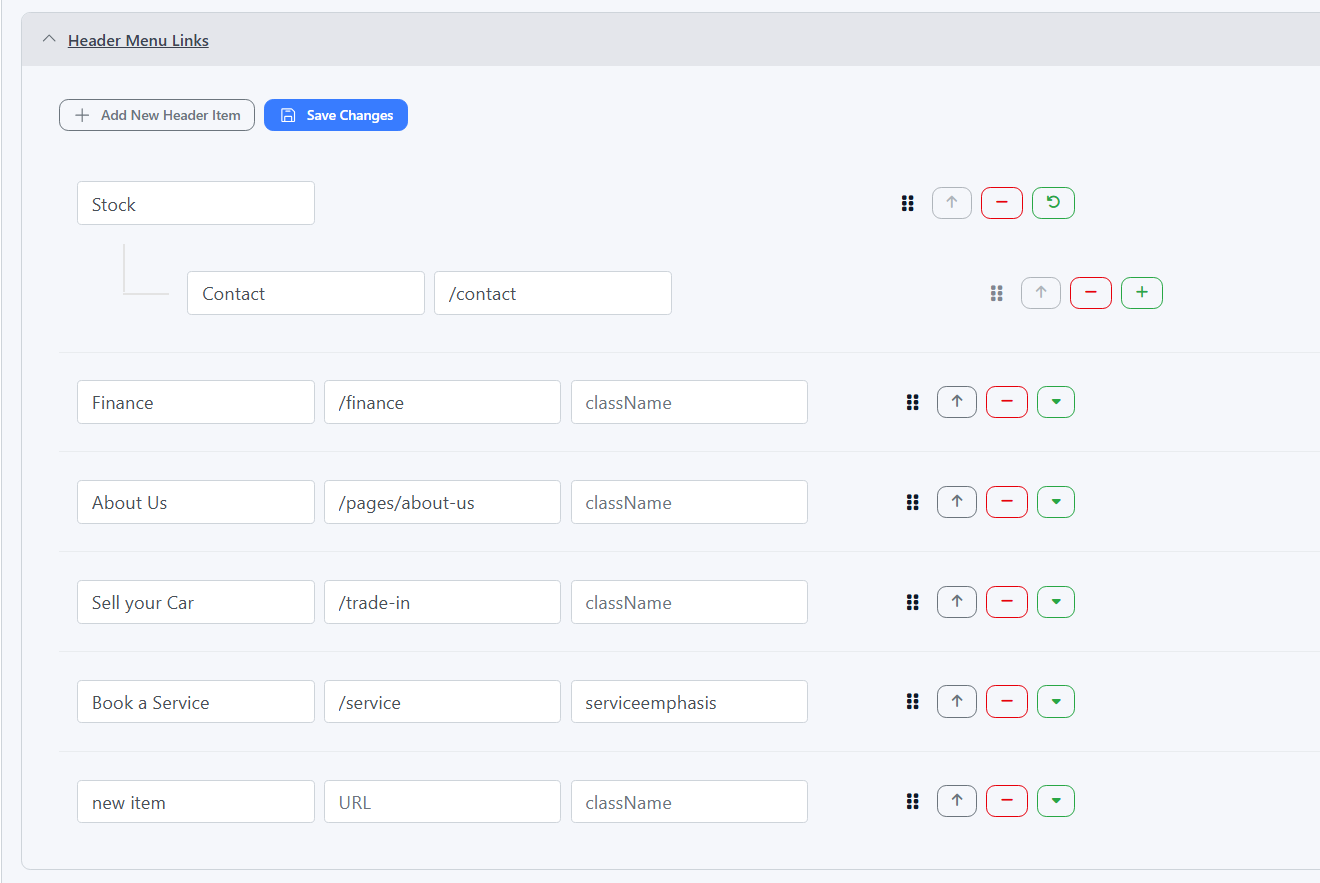
 Step 4: From here you can see your Header Items;
- You can remove using the red hyphen,
- You can move it upwards using the back arrow
- You can convert a header to a drop down by using the Green Arrow

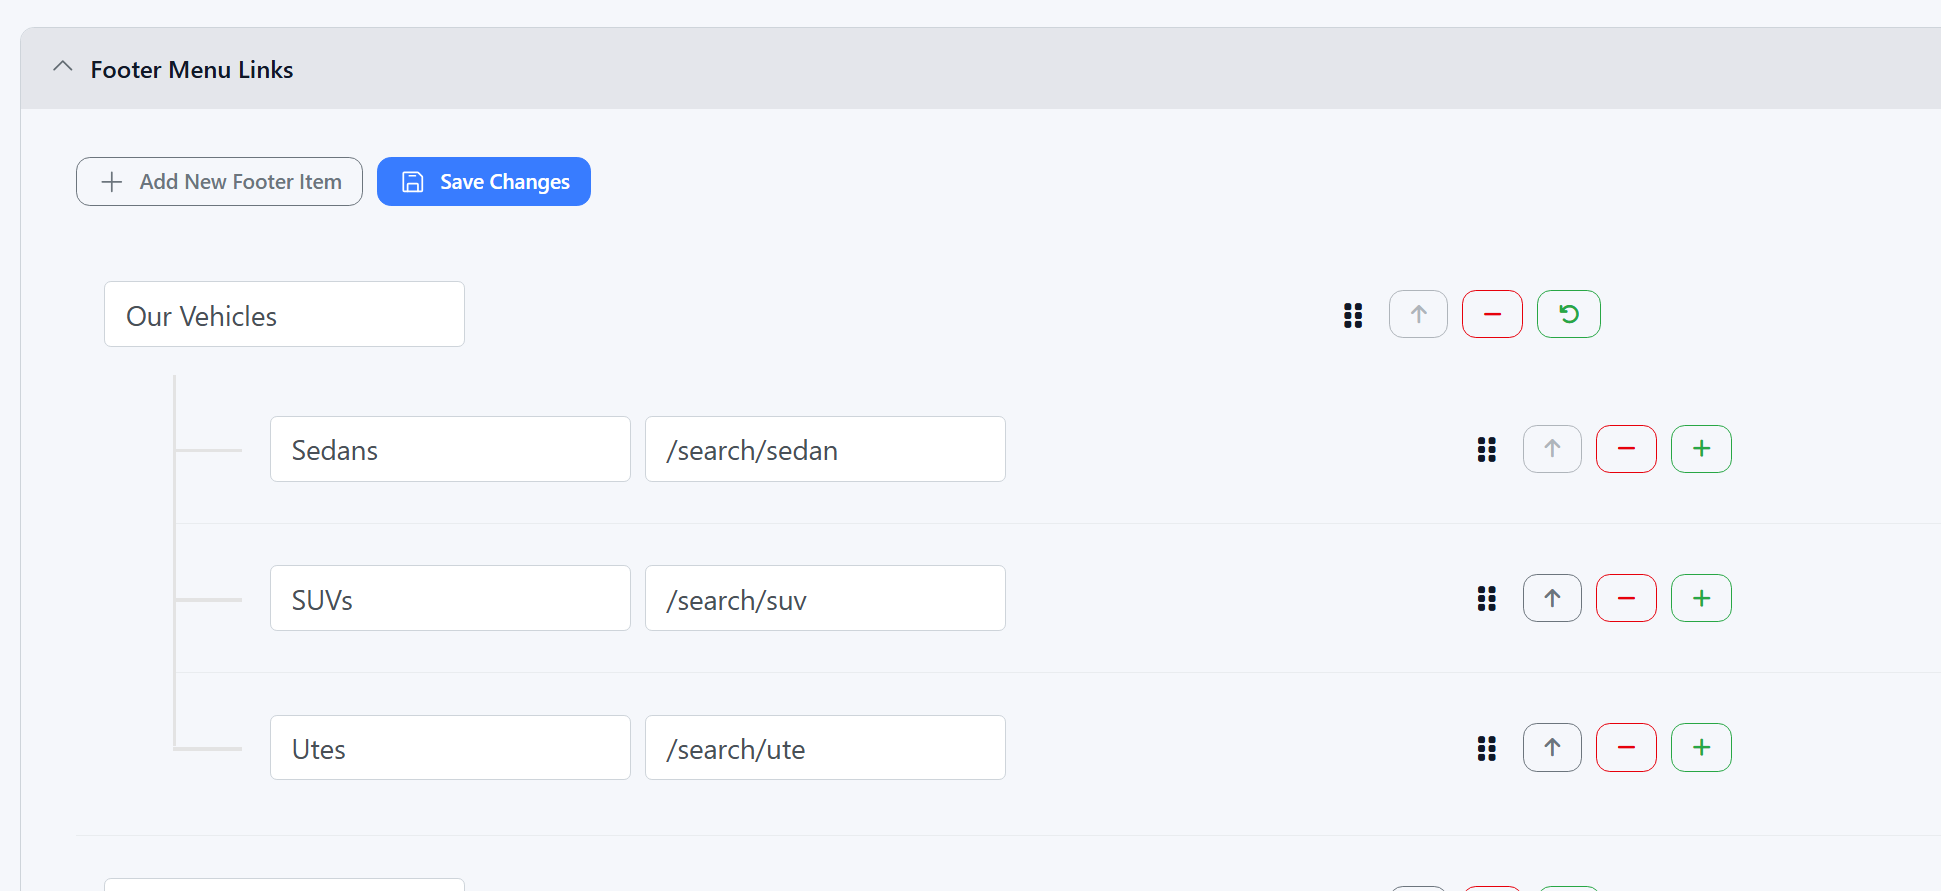
You also have this ability with the Footer Items;
Step 5: Banner settings are avaliable to edit, this edits the phone numbers or addresses along the top of a dealership;
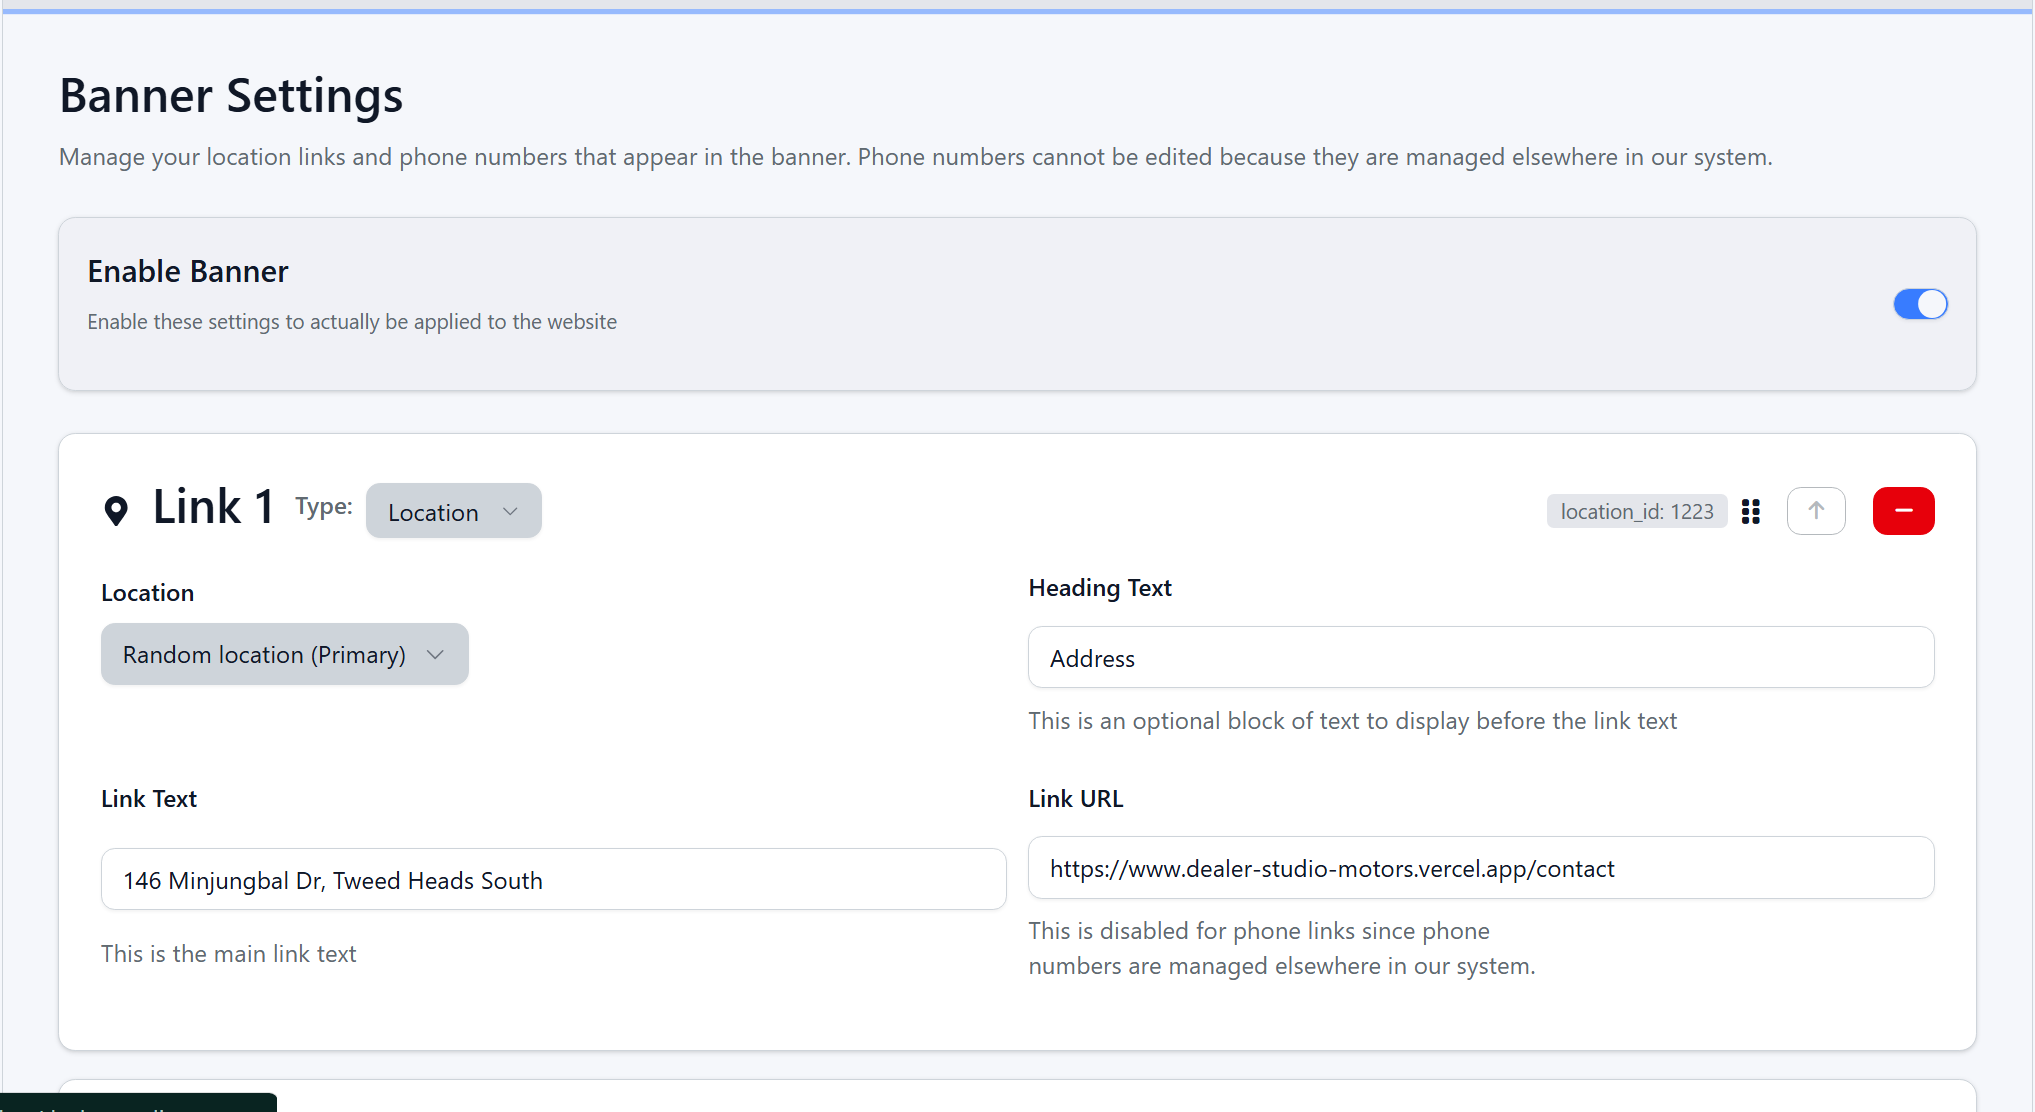
Please see example of this live:
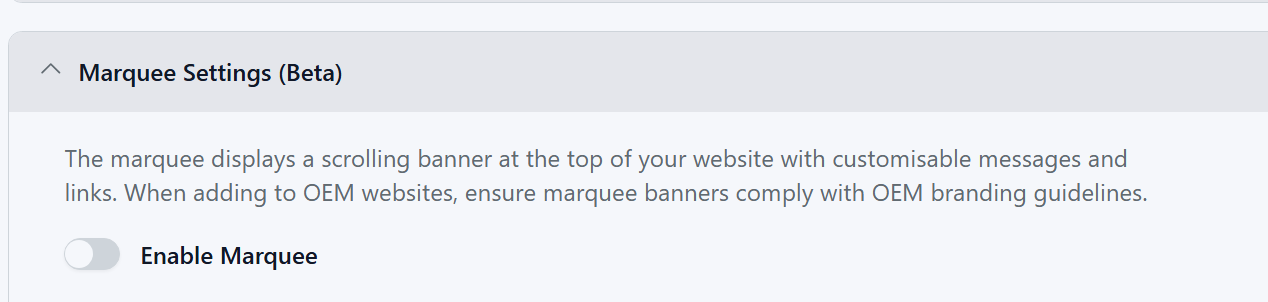
Step 6: The Final Item you can edit is 'Marquee Settings'
Step 7: You will need to Enable:
Step 8: You can then change the colours and the pages that it can display on;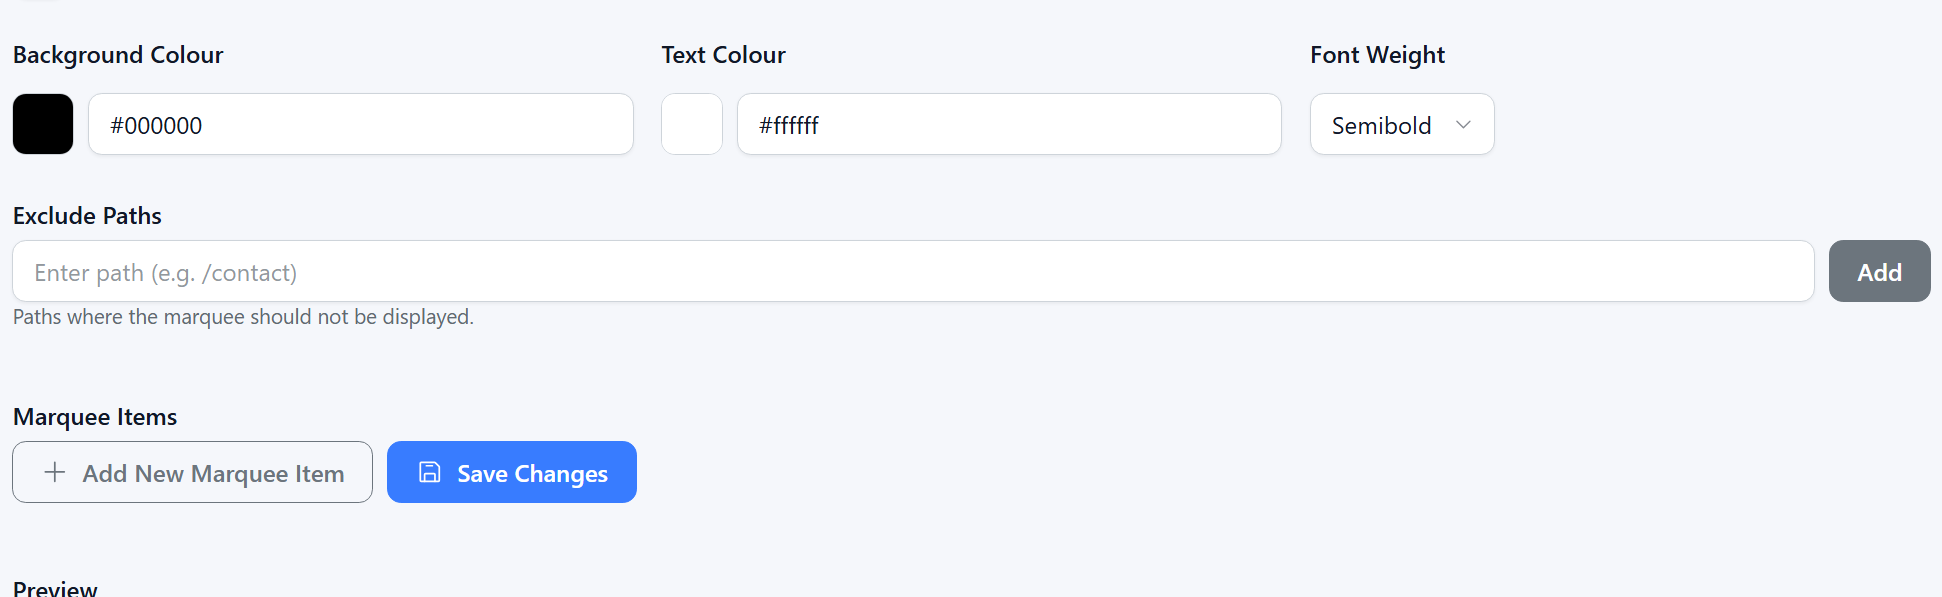
Step 9: There will be a preview at the bottom
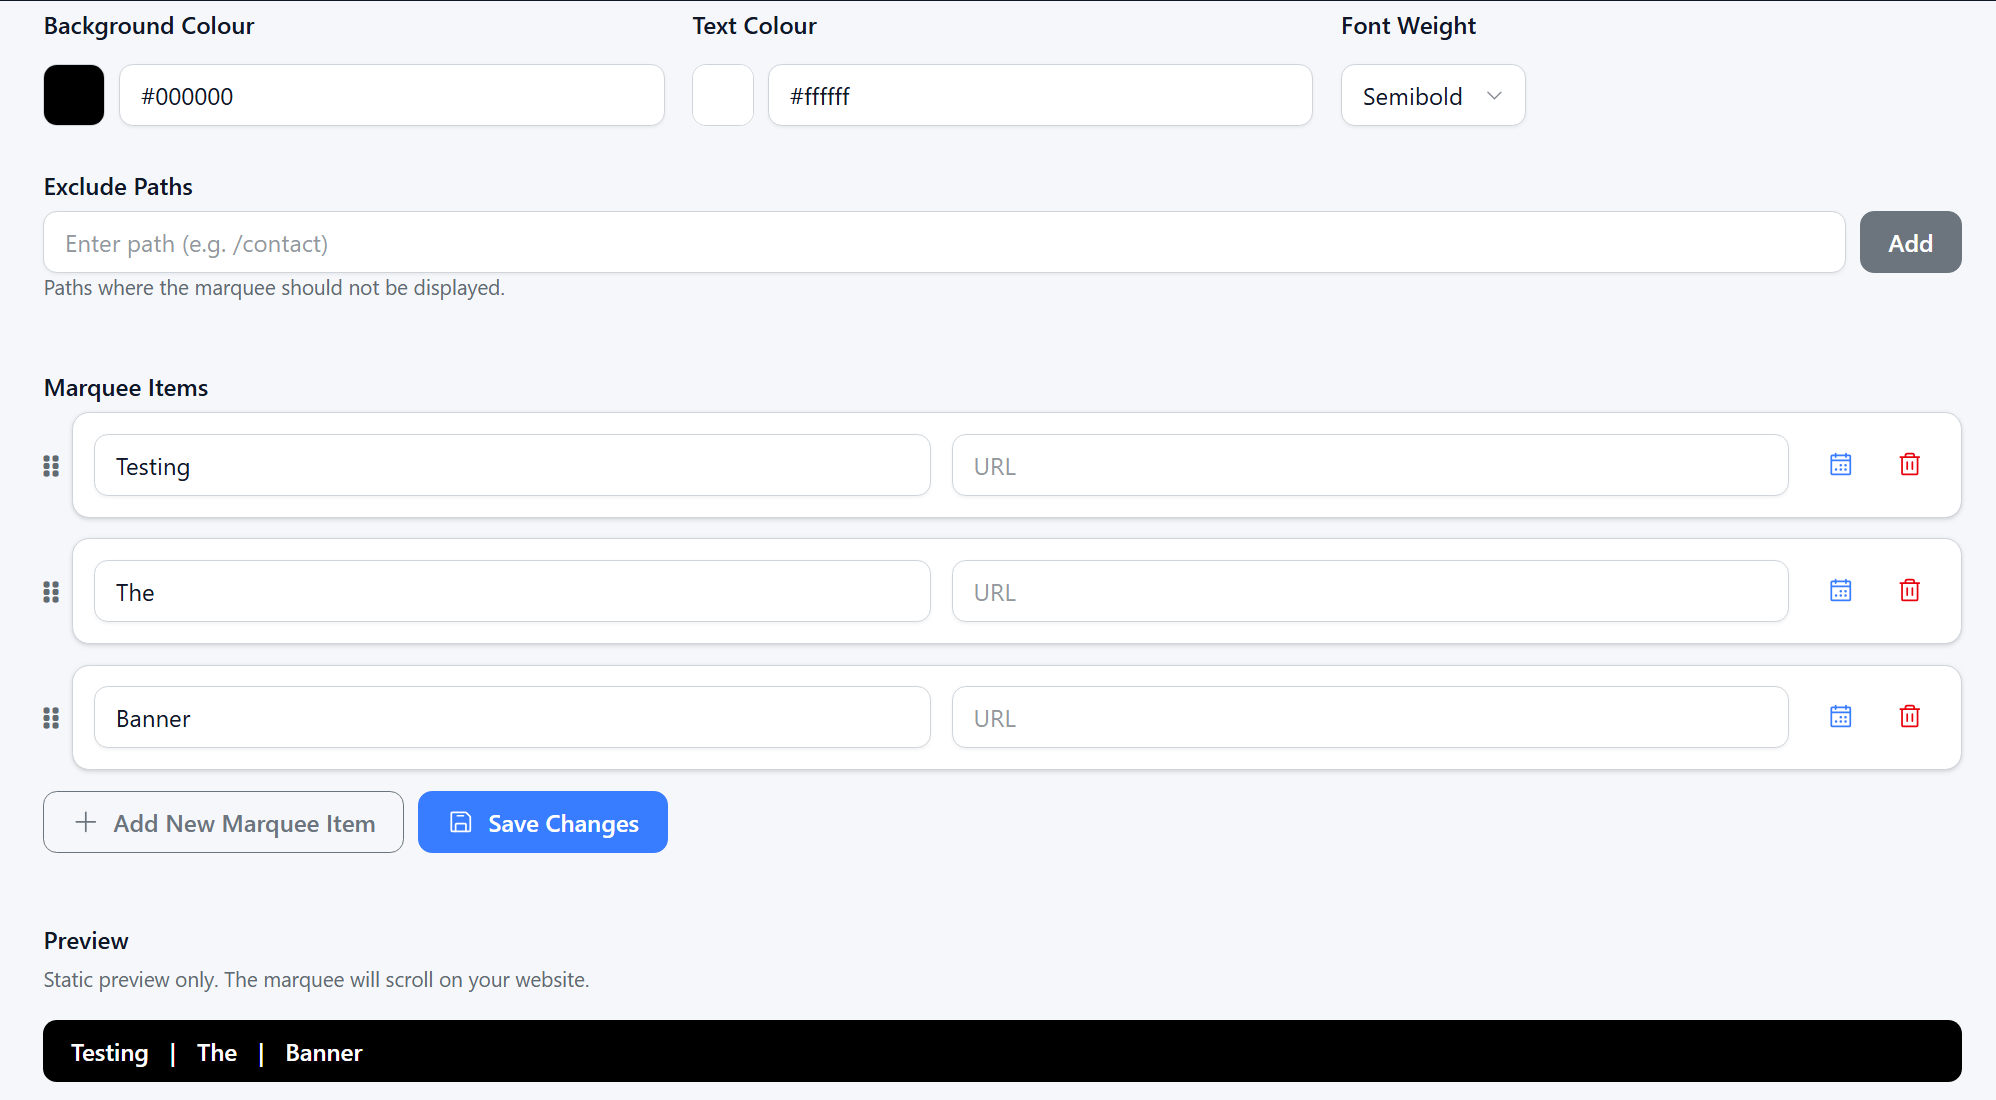
Please see example:

Was this article helpful?
That’s Great!
Thank you for your feedback
Sorry! We couldn't be helpful
Thank you for your feedback
Feedback sent
We appreciate your effort and will try to fix the article