This article explains how to create anchor links in the Dealer Studio Page Editor. Anchor links allow users to click a button and automatically scroll to a specific section on the same page. This is commonly used for sections such as Contact Us, Vehicle Enquiry, or Finance Options.
Before setting up anchor links, you must first access the Page Editor and add a button that will act as the link.
Video
Please refer to the attachment below for a visual walkthrough of how to set up anchor links.
Overview - Set Up Anchor Links
- Step 1: Access the Page Editor
- Step 2: Add a Button to Your Page
- Step 3: Configure the Anchor Link
- Step 4: Add an Anchor Point to a Component
- Step 5: Publish and Test the Anchor Link
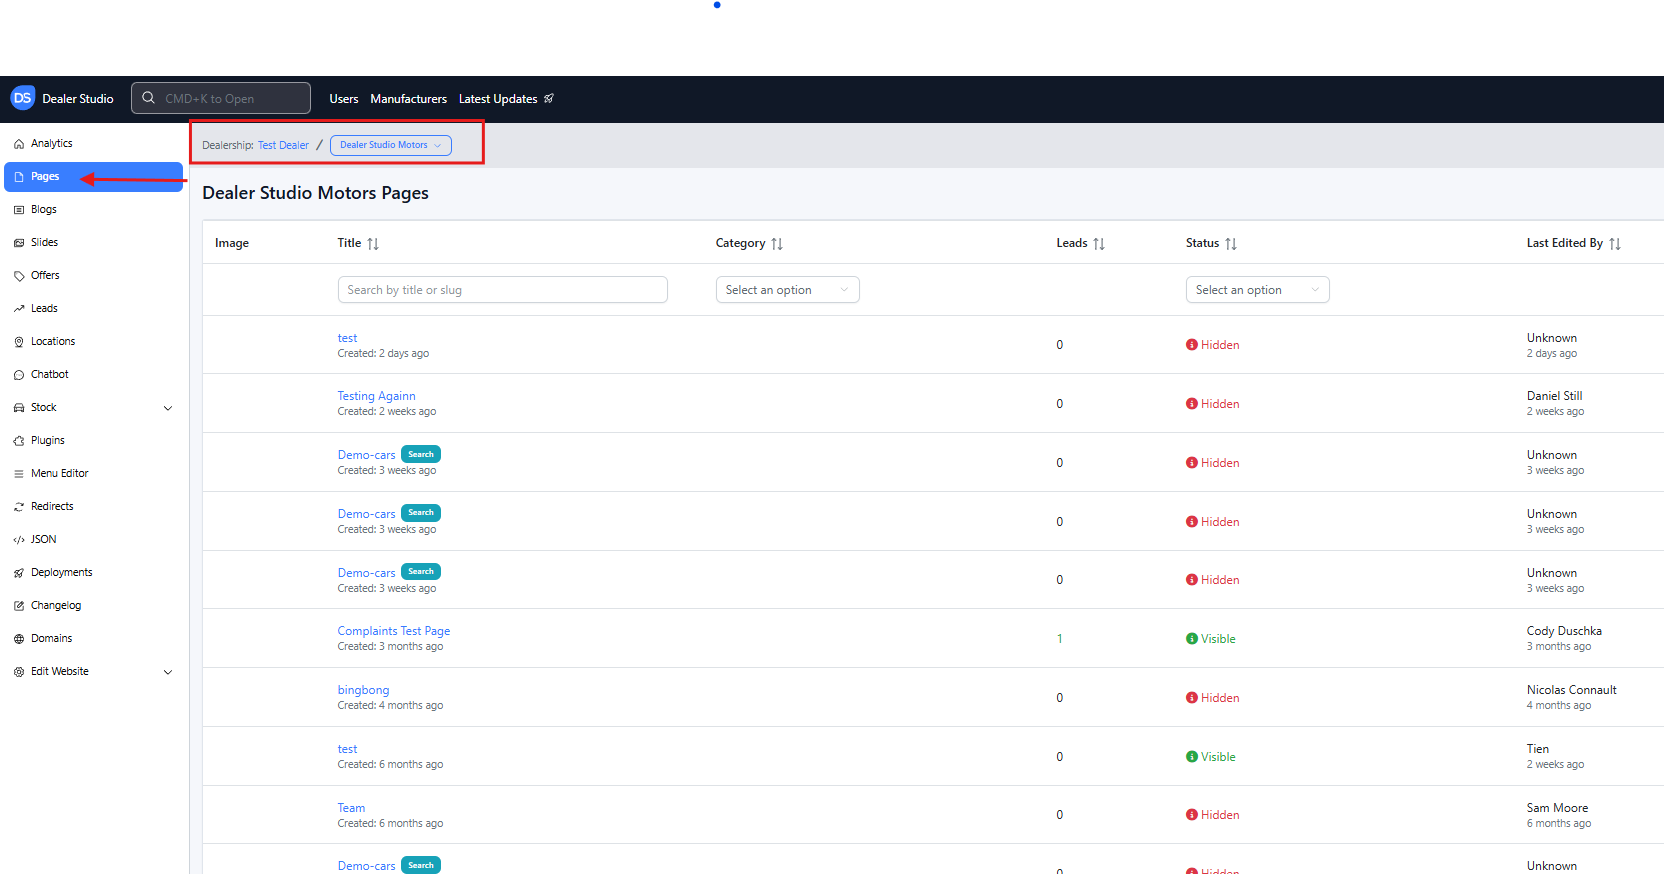
Step 1: Access the Page Editor
- From the Dealership Dashboard, select Websites.
- Select the website you want to edit.
- On the Website Dashboard, click Pages.
- Select the page you want to edit.
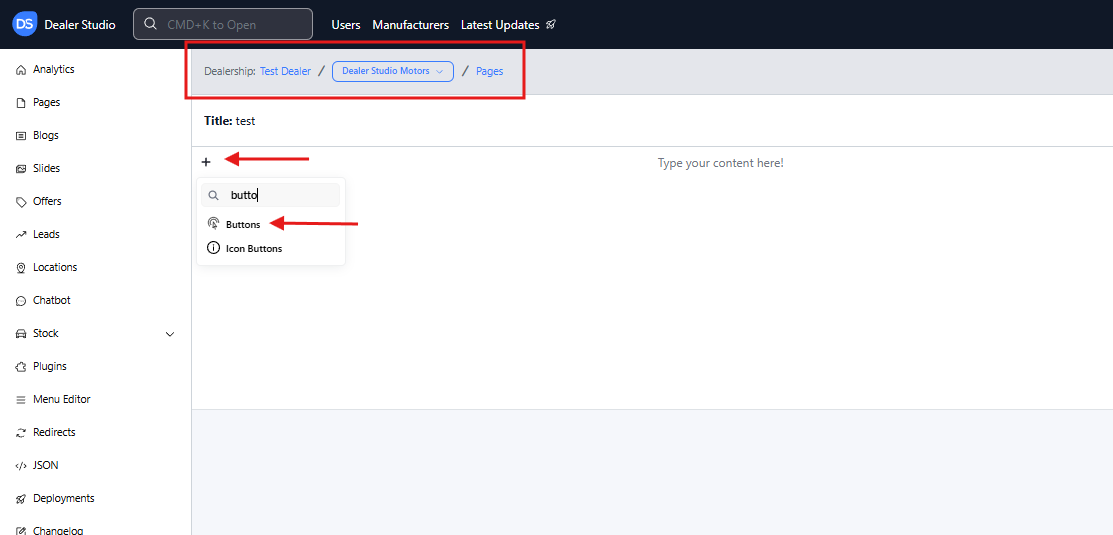
Step 2: Add a Button to Your Page
- Navigate to the area of the page where you want the button to appear.
- Hover your mouse on the left-hand side of the page until the + icon appears.
- Click the + icon.
- Scroll down and select Buttons.
A generic Contact Us button will appear on the page.
Step 3: Configure the Button
- Hover your mouse on the left side of the button until the 6 dots icon appears.
- Click the 6 dots icon.
- Select Edit Settings.
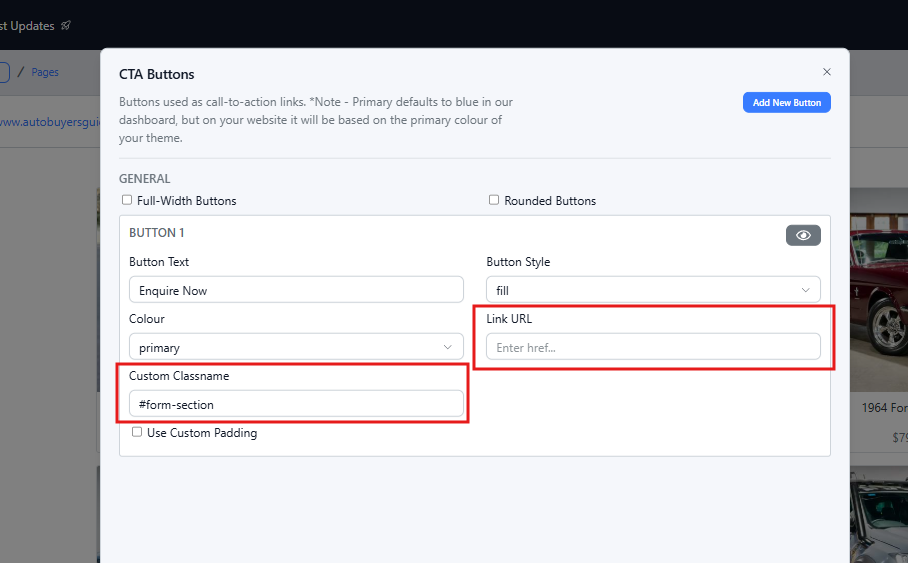
A settings panel will open where you can customise the button:
- Button text
- Shape (e.g., rounded buttons)
- Colour
- Link URL
- Custom Classname
For more details on button settings, refer to the article: Adding Buttons via Page Editor.

Step 4: Add Classname to the Button
To create the anchor link:
- In the same settings for buttons, remove the Link URL.
- In the Custom Classname field, enter the following format:
#referenceName
Example:
#form-section
This identifies the button as the anchor link trigger.
Step 5: Add an Anchor Point to a Component
Next, you must define the location where the page should scroll to.
- Navigate to the section of the page where you want users to land.
- Hover your mouse on the left side until the + icon appears.
- Add the desired component if it does not already exist. For eg: Form Builder component
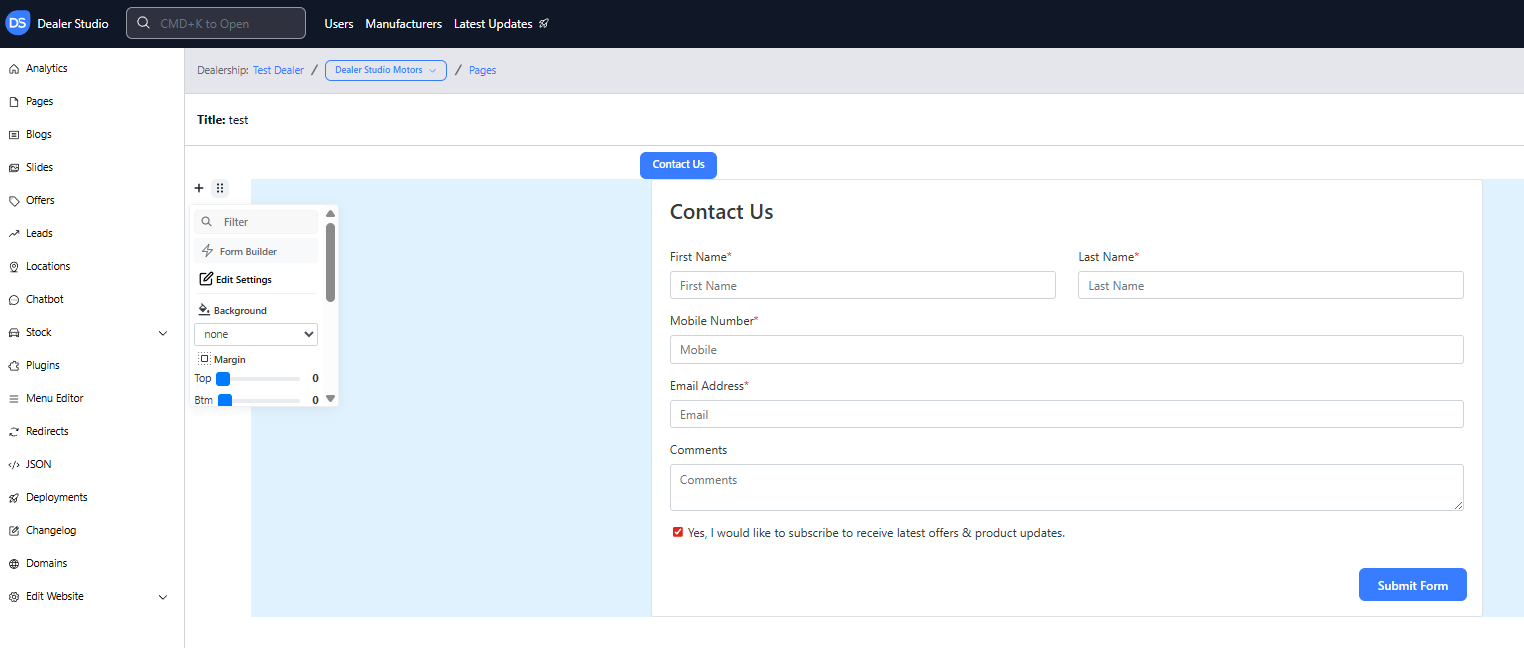
- Hover your mouse on the left side of the component until the 6 dots icon appears.
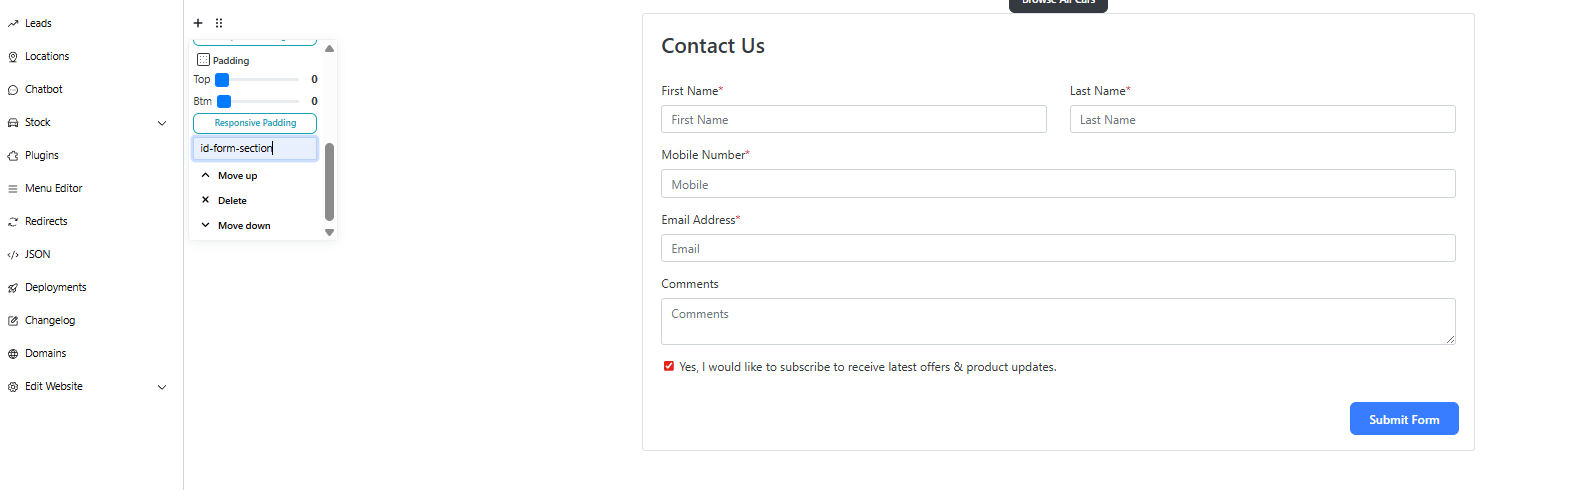
- Click the 6 dots icon and scroll to the Classname field.
Enter the following format:
id-referenceName
Example:
id-form-section
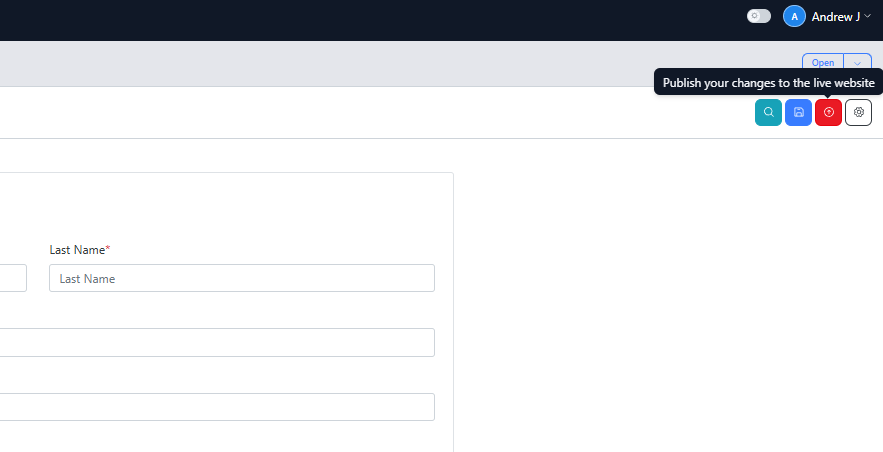
Step 6: Publish and Test the Anchor Link
- In the top right corner of the page editor, click Publish.
- This will save your changes and update the live page.
- Visit the live website and click the button to confirm the anchor link scrolls to the correct section.
Important
For anchor links to work correctly:
- The button must use the format:
#referenceName-anyName - The target component must use the format:
id-referenceName-anyName
Both reference names must match. Example:
- Button:
#contact-anyName - Target Section:
id-contact-anyName
When the button is clicked, the page will automatically scroll to the target section.
How It Works?
Anchor links connect a button trigger to a target component on the same page.
- The button uses
#to define the anchor link. - The target component uses
id-to define where the page scrolls to.
As long as the reference names match, the button will direct users to the correct section.
Was this article helpful?
That’s Great!
Thank you for your feedback
Sorry! We couldn't be helpful
Thank you for your feedback
Feedback sent
We appreciate your effort and will try to fix the article